
I’ve been taking advantage of a lull in the usual frantic round of talks, teaching, WoW and Quiltwow preparation and email answering to do some work on the next book - the Mixed Media one. There’s been a lot of interest (and a lot of books) on this subject so I will concentrate on ways to combine it with stitch.
Lovely to have a whole day to devote to just making things. It doesn’t take long to do the writing but the actual pieces take much longer and many are rejected. I do think a whole book on ‘How to recycle a failure’ would be a great idea.
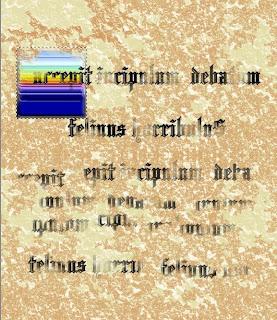
I promised a tute on cloning for lettering, which I often use in mock manuscripts or icons, such as the one below. Here goes.

I think that you have to be careful about copyright so investigate fonts - I used one called blackletter686. Sometimes I scan some of Clive’s calligraphy.

The next step is to open a new page and fill a background with a parchment-like colour and add texture. Make the texture quite strong.

Use the Fill bucket to fill the blank page. Still using the Fill, change the tolerance to a low number and add more fills in some places using a slightly different colour. If the whole page fills, lower the tolerance.

Now go back to the lettering page. Your background colour for this should be white, so make sure that the background colour in the materials palette is white (see below). Then use the Select tool to draw a rectangle around the lettering. Copy this using Edit, Ctrl and C or clicking the Copy icon.

Click on the prepared background and then Edit, Paste as Transparent Selection.
Go to the Selections Menu and click on Promote Selection to Layer. Those of you who are familiar with layers will know that there are quicker ways of getting to this stage, but they are more difficult to explain to those who don’t use layers. Then Selection menu again and click Selections None.
Go to the Selections Menu and click on Promote Selection to Layer. Those of you who are familiar with layers will know that there are quicker ways of getting to this stage, but they are more difficult to explain to those who don’t use layers. Then Selection menu again and click Selections None.

This gives you a background of coloured paper with a layer of text floating above it. Use the eraser to rub out some of the text for an aged look. Then use the Clone Tool. (I don't have the aligned tool enabled). Place the cursor over some of the lettering and click your right mouse button. Then paint elsewhere on the page using the left button. It will copy the lettering wherever you paint. Watch the area you right clicked and you will see an X passing over it to show the bit you are copying.

You could click on the paper layer and draw a little shape under a letter with the Shape tool. This looks a bit like an illuminated manuscript.

When you have done, you could play a little with the Blend Modes in the Layer Palette.

Or Merge it all to flatten it and have some fun with the Warp brush (Arrow next to Paint Brush Tool).

I usually print it out on tissue paper by sticking the tissue edges to a piece of printer paper. Then use fusible webbing to get it onto fabric or Vilene. In the piece below, I have done this and sprayed it all with webbing spray. Then added a print on metal.

Here's the finished piece, not a good pic.

I have to go as the GCs are here and they have brought Smudge for a visit. Only two weeks until he moves in.
8 comments:
Thanks, Maggie, I am having great fun playing with your cloned letters. Just love your blog,
Love Cathy.
Hi Maggie,
A lurker here that has little experience with surface design but loves to learn about it. Two questions:
Is the software that you used here Paintshop Pro?
Can you explain in a little more detail the step of printing it out on tissue paper, etc? You lost me there. Thank you!
Diane
Sorry, Maggie, still having trouble finding the pic icon so that I can browse to my 'photo folders and then post to your blog!
Searched every where .... so sorry!
Love Cathy.
I could definitely use a book on how to recycle failures!
مكونات السقالات المعدنية تتكون من عدة أجزاء تعمل معًا لتشكيل الهيكل المستقر. إليك بعض المكونات الأساسية للسقالات المعدنية:
1. الأعمدة (Standards): هي الأجزاء الرئيسية التي تسند بقية المكونات وتعمل كعمود للدعم الرأسي للسقالة. تكون الأعمدة عادة مصنوعة من الفولاذ المجلفن، وتكون لديها ثقوب لتثبيت القواعد والألواح العمودية.
2. القواعد (Base Jacks): تستخدم لضبط ارتفاع السقالة وتوفير الاستقرار على الأرض. توجد شركات الشدات المعدنية قابلة للتعديل في أسفل الأعمدة لتوفير استواء تام للسقال
إرشادات اختيار افضل حذاء للامان للعمال من Safety shoes companies in egypt :
الحماية من الصدمات: تحقق من وجود نظام حماية في منطقة الأصابع (steel toe cap) لحماية قدميك من الصدمات والسقوطات.
نعال مضادة للانزلاق: تأكد من أن الحذاء يحتوي على نعال مضادة للانزلاق، خاصة إذا كان سطح عملك رطبًا أو زلقًا.
انواع المراجل البخارية المتوفرة في شركة الوطنية افضل شركات الغلايات
المرجل البخاري ذو الأنابيب النارية (Fire Tube Boiler):
- يحتوي على أنبوبين، أحدهما لمرور الغاز الساخن والآخر لمرور الماء.
- يتميز بتصميمه البسيط وسهولة استخدامه وصيانته.
- يستخدم عادة في المباني السكنية والفنادق.
المرجل البخاري السريع الهرواني (Once-through Boiler):
- يتميز بسرعة تسخين الماء وتحويله إلى بخار بفضل تصميمه الفريد الذي يسمح بمرور الماء في مجرى واحد فقط.
- يستخدم عادة في الصناعات التي تحتاج إلى بخار عالي الضغط وعالي الحرارة.
إنأفضل ماكينات تعبئة بقوليات اوتوماتيك ونصف اوتوماتيك تلعب دورًا حيويًا في تحسين عمليات الإنتاج وجودة المنتجات الغذائية في مصر، مما يعزز من نمو وازدهار الصناعة الغذائية بشكل عام ويتم تغليف المنتج باستخدام عملية تعبئة محددة حسب نوع المنتج ومتطلبات التغليف، وتشمل هذه العملية عدة خطوات مثل وضع المنتج داخل العبوة، وإغلاق العبوة بوسائل مختلفة مثل الحرارة أو الضغط أو الشفط وفي بعض الأحيان، يتم طباعة المعلومات الضرورية على العبوة مثل تاريخ الإنتاج، تاريخ الانتهاء، ومعلومات التغذية الغذائية.
Post a Comment